How can we help you?
How do I set up/manage my aliases?
Aliases allow you to set up an additional email address on your account. To read more about Aliases, please see our help guide here.
You can set up and manage your Aliases by logging in to your Account and going to the My Account dashboard. If you are logged in to your webmail inbox, you can access My Account by clicking on the button in the top right of the page.
On the My Account page, you will be able to click on Email Accounts on the left. This will show you all the email accounts you currently own. Each of your email accounts will have a Manage Aliases button. It will also list how many Aliases you can have on your email account.

Clicking on Manage Aliases will take you to the page in order to set up or edit your Aliases.
If you are already using all of your Aliases and would like more, you can click on Purchase. This will take you to the Payment Portal, and you can select a Package or Bolt-On if you would like more Aliases.
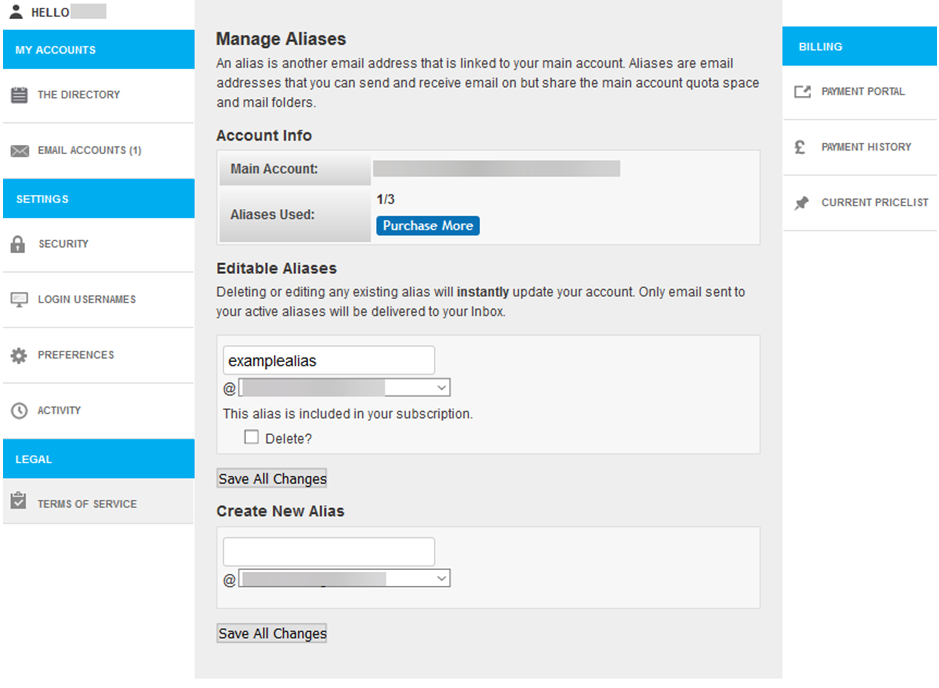
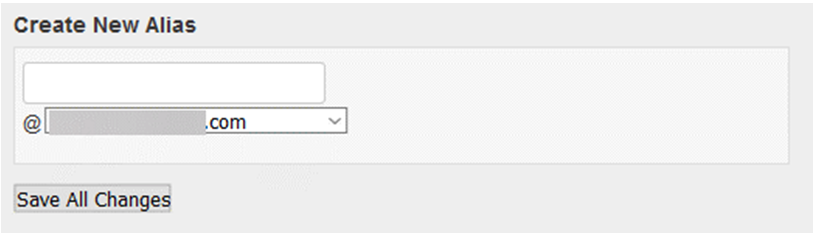
- To add an Alias: Use the Create New Alias box to set up a new Alias. You can choose what address the Alias has, and can select which domain you wish to use from the dropdown. You can then click Save All Changes to save your new Alias.
- To edit an Alias: If you have an Alias already set up, it will appear in the Editable Aliases section. If you wish to change the Alias address, simply change it in the text box. You can also choose a different domain if these are available, by selecting this from the dropdown box. You can then click Save All Changesto save the changes you have made.
You can update an Alias as much as you want, but when you update it, it will delete the old one. If an email is then sent to the old Alias, it will be bounced back to the sender. The new Alias you have set up will be active immediately, and emails can be sent to it as soon as you have saved it.
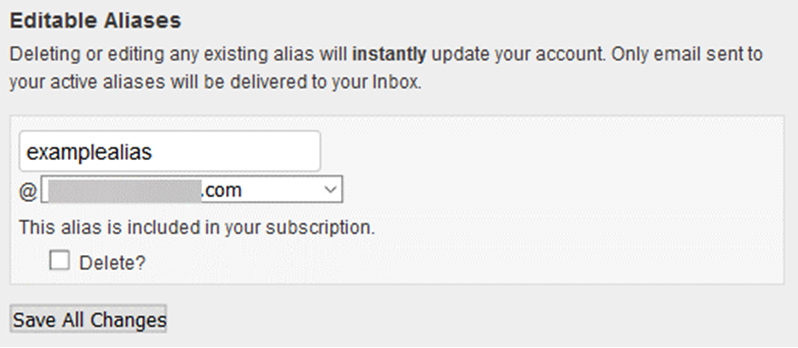
- To delete an Alias: If you wish to remove an Alias completely, you can select the Delete? Tickbox in the Editable Aliases section. Once you have ticked this box, you can click Save All Changes to remove the Alias from your email account.
If an email is then sent to the deleted Alias, it will be bounced back to the sender.
If you would like to set up your email account to send emails from your alias, you can set it up as a Multiple Identity. You can read more about Multiple Identities in our help guide here.
If you have any questions about setting up or editing your Aliases, please contact our helpdesk at help@aluminati.net